This chapter tells how you can create an image with high dynamic range - a so called HDRI - from a series of differently exposed photos. FDRTools implement several methods for HDRI creation. Each method covers an other aspect of this subject. You can switch among the methods by choosing one of the tabs Average, Separation or Creative in the HDRI Creation module.
Average calculates the HDR image as a weighted sum of the source images. This is simple and works automatically but has the disadvantage of creating so called 'ghosts' with moving objects. Ghosts are e.g. persons moving through the scene and showing up in several photos. When mixing the photos these persons then also show up several times in the resulting HDR image. Not all moving objects yield visible ghost artefacts. Scenes with moving clouds or water are normally noncritical as the ghost artefacts do not catch the viewer's eye.
|
|
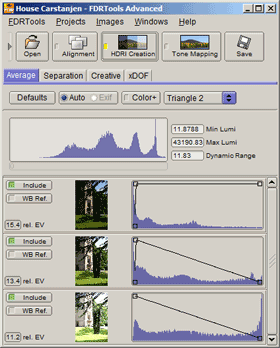
| The Average dialog |
Controls and buttons impacting all images are located in the upper part of the dialog:
Below these controls there is a histogram display. The histogram displays the intensity spectrum of the resulting HDR image. To the right are the measured values for minimal and maximal luminance. Below is the image dynamic range in EV units, calculated from minimal and maximal luminance. Note: the stated dynamic range value is an estimation, calculated from the pixels of the Navigator image.
Below the histogram display the source images are listed as layers. The following parameters steer the influence of a layer on the result:
Hint: modification of a weighting curve can be synchronised among layers. To do this select the layers to synchronise and then modify the curve of one of the selected layers.
Separation - unlike the Average method - does not mix the pixels of the source images. Instead the image is assembled from several intensity ranges. Each source image contributes one intensity range. All resulting pixels within this intensity range emanate from the respective source image - an exception to this rule is the exposure transition range, see below. Separating the intensity areas allows to suppress 'ghosts' in scenes with moving onjects in a simple yet often successful manner. Further it allows optimal suppression of noise. Both aspects are described in more detail below.
 |
|
| The Separation dialog | |
Controls and buttons impacting all images are located in the upper part of the dialog:
Below these controls there is a histogram display. The histogram displays the intensity spectrum of the resulting HDR image. To the right are the measured values for minimal and maximal luminance. Below is the image dynamic range in EV units, calculated from minimal and maximal luminance. Note: the stated dynamic range value is an estimation, calculated from the pixels of the Navigator image.
Below these sliders the source images are listed as layers. The following parameters steer the influence of a layer on the result:
The following example shows how to use the separation sliders. The scene shows a typical use case for this method: separation is easy and effective if the scene is easily separable into several intensity areas and the moving objects are each completely within the respective intensity area. In this case two areas can be distinguished: the sky with the sunlit house walls and the shadowy area where two ladies are walking. Both ladies are complete in the shadowy area.
 |
||||
| Separation example | ||||
'Defaults' shows the 'ghosts' caused by the moving persons. Separation now means to take the light areas from the first image while the shadowy areas - with the ladies - are taken from the second image and evtl. very dark areas from the third image. To accomplish this one simply has to move the slider of the bottom image to the left until the ghost artefacts are gone, see 'Separated without mask'. 'Separated with mask' shows which pixels are adopted from the middle (selected) image. Areas that are not adopted are colored red. The separation mask is a good aid when adjusting the sliders.
This example also reveals a side effect of the separation. The photos were taken freehand and hence are slightly misaligned. The alignment function has corrected the horizontal and vertical shift but more complex contributions like rotation etc. have not been corrected. This can be seen when toggling between 'Defaults' and 'Separated without mask': the buildings move slightly between the two views. Here the separation reduces visible seams because seams form only along the separation boundaries. This positive trait often hides 'slight jitters' or at least makes them less noticeable.
Creative is a method for the creation of HDR images from arbitrary image material. The process can be steered with a couple of parameters and hence is quite flexible. The essential difference to Average and Separation is that images with differing light sources (position, intensity, color spectrum) can be mixed. This allows for interesting effects.
 |
||
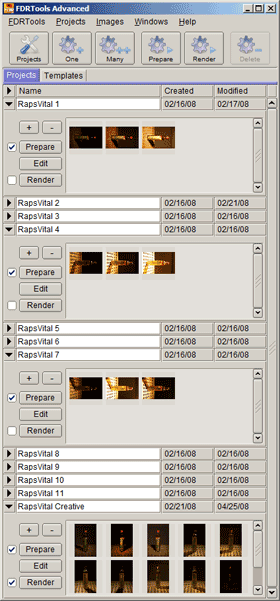
| Project consisting of 11 exposure series |
In the following example an object is illuminated from different directions. For each of the directions a HDR image is created and these HDRs are then merged with the Creative method. The result shows an object that acts quite 3-dimensional and does not cast shadows though it obviously has been illuminated.
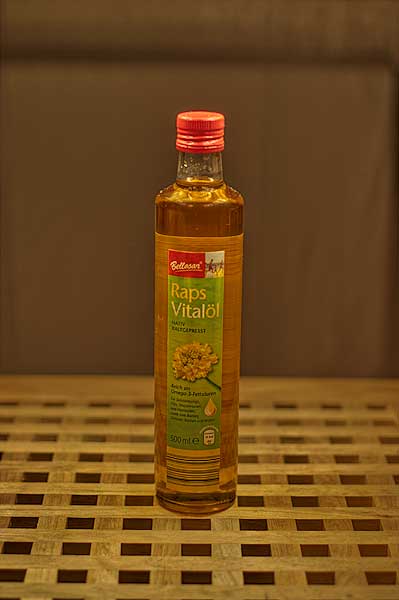
The figure to the left shows the project. The object (a cooking oil bottle) is spot-illuminated from on high. The spot is then moved around the object in steps and an exposure series +2, 0, -2 EV is taken at each position. Then a HDR image is created from each of the exposure series. Thus 11 HDR images are produced in total, see the projects RapsVital 1 to RapsVital 11. The figure exemplarily shows the images for three of the eleven positions.
The HDR images of the several positions are now combined to the new project RapsVital Creative. The project is opened with the editor and the Creative method is chosen for HDR creation. The intensity curve is adapted as shown in order to remove remains of shadows. Changes to other parameters are not necessary. Finally the image is tone mapped with the Compressor method and the result is saved.
Hint: for best results with method Creative you should use high quality image material. That is to say: the images should neither be noisy nor overexposed. For this reason a HDR image is created at each position in the example before merging them with Creative.
Hint: you should use HDR images for mixing images with Creative but not tone mapped LDR images. While that works too the quality of the resulting image is not optimal.
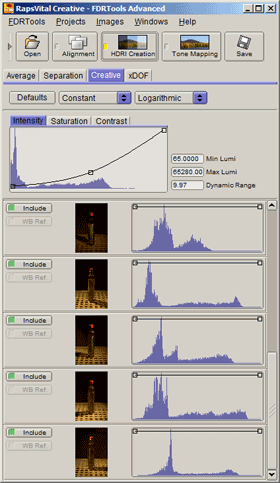 |
||
| The Creative dialog |
In principle Creative is used like methods Average and Separation. Controls and buttons impacting all images are located in the upper part of the dialog:
The browser below lists the source images as layers. The following parameters steer the influence of a layer on the result:
Hint: modification of a weighting curve can be synchronised among layers. To do this select the layers to synchronise and then modify the curve of one of the selected layers.
 |
||
| Migratory light source compared to stationary light source |
The figure to the left shows the resulting image compared to one of the original positions.
(Both images were created with the Compressor tone mapper and then slightly postprocessed in an image editing application: curve and sharpening).
When looking at the image emanating from the migratory light source one notices that the object does not cast a shadow. That looks strange because the object was obviously illuminated as the traces of the spot light at the bottleneck and the closure show.
The direct comparison to the 'normal' image - shot with stationary light source - shows some differences. The regions lit by the spot are especially bright and hence contrasty while contours lying in the shadow are dark and hard to recognize. The migratory light source in contrast illuminates all contours of the object and makes them clearly visible. This makes the object look '3-dimensional'.
Differences in the footprint can be noticed just as clear. Illuminated from one direction the footprint appears unfamiliar while with illumation from all sides the structure emerges very clear.
The object is clearly silhouetted against background and footprint and seems to 'levitate'. This effect is exaggerated by choosing a large aperture (2.0).