This is the first in a series of tutorials that explain how to use
FDRTools. Quick Start is for all photographers who have never
used FDRTools before.
Installation
The installation procedure depends on the used operating system:
- Windows: Double click the downloaded
installer file. An assistant will guide you through the installation
process. A link to the executable will be created on your desktop.
- OS X: When the download has finished a
Finder window opens up showing the FDRTools folder. Drag the folder to
your preferred destination. You will find the executable FDRTools
within the folder FDRTools.
Creating exposure series
One of the essential functions of FDRTools is to merge the images of an
exposure series into a so called HDR image. When doing such an exposure
series you should observe the following:
- The camera must not jiggle while taking the exposure
series. Therefore mount your camera to a tripod.
- Pay attention that your exposure series cover the
whole dynamic range of the scene. In the most bright picture every
details of the darkest areas should be clearly visible. Contrary in the
most dark picture every details of the brightest areas should be
clearly visible.
- The images of an exposure series should have
exposure differences between two and four EV or f-stops. Using the
Automatic Exposure Bracketing functionality that most digital cameras
possess can be beneficial.
- To alter the exposure value vary the exposure time.
Keep the aperture value constant.
- All images of an exposure series should be taken
with identical white balance setting.
We recommend to use RAW format whenever your camera
supports this.
Create and edit a Project
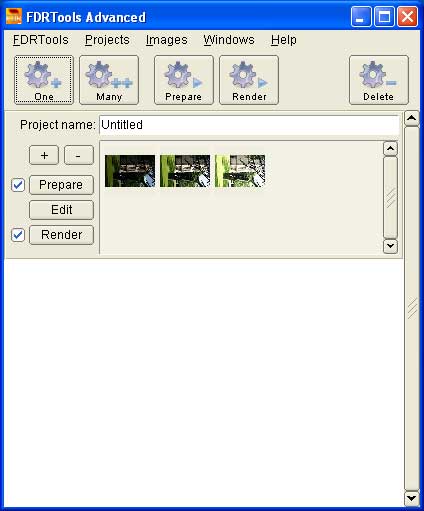
FDRTools starts up in Project View. A project comprises the images of an exposure series and the corresponding HDR and tone mapping parameter settings. Projects are stored when you quit the program and are reloaded with the next program start.
We create a new project pressing the "One" button. The image chooser dialog opens up. For this tutorial an example image set is delivered with FDRTools. You can find it in the FDRTools -> images folder. Choose file type Generic JPEG. Choose all the images (0.jpg to 2.jpg) and press the OK button. A project is created.
| |
 |
| |
FDRTools in Project View |
Press "Edit" to open the project in editor view. The images of the exposure series are loaded into the editor for further processing. With Images -> Orientation -> Rotate 90 degrees CCW we give the image the correct orientation.
Preliminary result
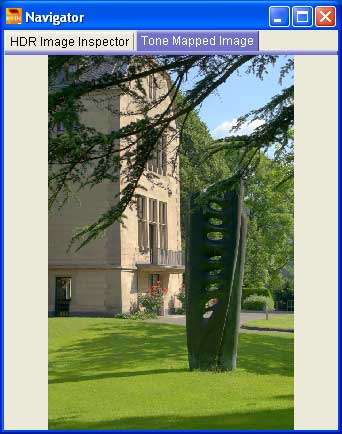
The images which have been loaded will be processed automatically. The
prelimanary result will be displayed without the need of any further
input in the Navigator window which is displayed besides the main
window.
| |
 |
| |
The Navigator window of FDRTools |
Naturally it is possible to refine this intermediate result and to
adopt it to your individual wishes and imaginations.
Optimization
In the course of the automated processing the following intermediate
steps
- Alignment
- HDRI creation
- Tonemapping
will be passed through according to the default settings. The settings
of all individual steps can be verified afterwards and alterated
adequately. In reality it will frequently be necessary to proceed in an
iterative way to succeed. Subsequent you will find a short description
of the intermediate steps.
Alignment
Even in the case of a carefully prepared exposure serie it may happen
that wind movement, slight ground motion or mechanical vibration
according to shutter automatic will result in slight horizontal or
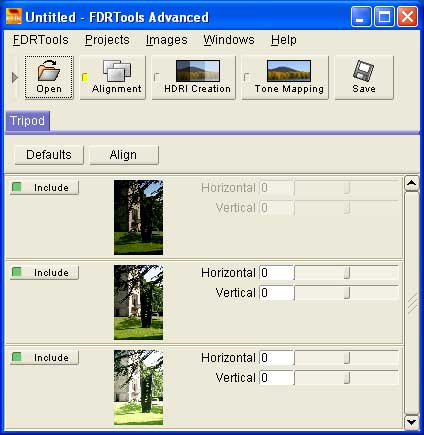
vertical jiggling of the single exposures. The module Alignment allows
to overcome these displacements.
The following exposure serie obviously has been taken without any
faults. After the automatic alignment there are no displacements
visible. That is not the normal case. Quite often you will see positive
and negative numbers in the screen seen below.
The result of the automatic alignment may be altered eventually. The
result of the changes are displayed in the Navigator window.
| |
 |
| |
The alignment dialogue / module Tripod |
HDRI creation
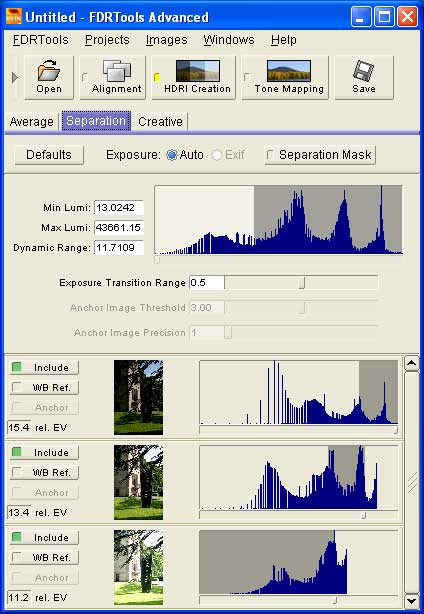
The HDRI creation process serves the combination of the different
exposures of a scene resulting in a new and homogenous image, the HDR
image or short HDRI (high dynamic range image).
The FDRTools let you choice between three different methods of HDRI
creation. The Basic und Advanced version contain the method Average.
With normal exposure series this method allows for a good noise
reduction of the resulting HDRI. Consequently you may achieve final
results with good quality.
The Method Separation, which is only within the Advanced version,
alllows for an excellent noise reduction of the resulting HDRI and lets
you achieve results with optimal quality. A notably speciality is the
deghosting feature, which lets you suppress any kind of motion blur or
"ghosts".
The method Creative, which is as well only within the Advanced version,
is designed for photographers who are looking for innovative and
creative ways of composing images with HDR techniques. You may combine
any kind of images. The method is similar to the well known blending
methods of Photoshop or GIMP, but is not restricted to 8 or 16 bit per
colour channel. The method is still in development.
| |
 |
|
|
| |
The HDRI creation dialogue |
The resulting HDR image contains up to 32 bits of
information on luminousity distribution per colour channel. However
your display lets you only view 7 or 8 bits. Therefore it is not
possible to view the HDRI on conventional media like monitors or
printers. However when switching in the Navigator window to the panel HDR Image Inspector you may inspect
the HDR image in 7 or 8 bit slices. You may alter the slice with the
scroll bar in the bottom of the window.
Tonemapping
The HDR image which has been produced as described in the last section
contains up to 32 bit information on tonal range. The subsequent
process of tonal range compression, often called tonemapping,
transforms this image in a monitor viewable and printable result.
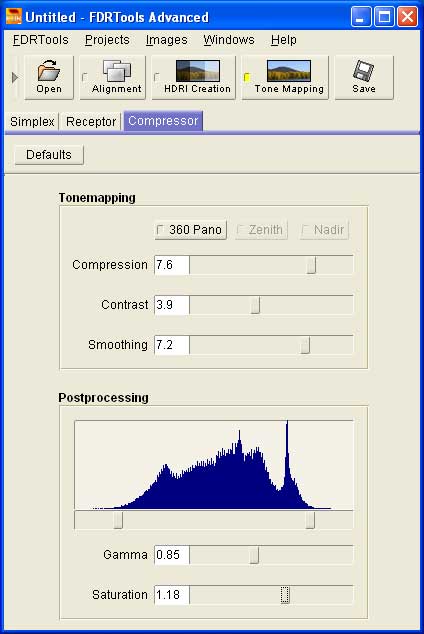
In the main window choose the Tone Mapping dialog and one of the
methods Receptor or Compressor (last one in FDRTools
Advanced only). For this tutorial the tone mapping parameters were adjusted as
shown in the picture below:
| |
 |
|
|
| |
The Tone Mapping dialogue |
You can see the resulting image in the Navigator window
by switching the panel Tone Mapped
Image.
Compressing the tonal range we have created a contrasty
image revealing all the details of the scene. While HDR images are not
suited for display on conventional media, the image treated with method
Compressor is optimally suited for display on a
monitor or a print.
Saving the result
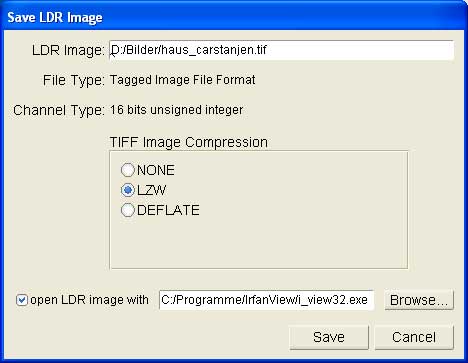
Creation of the final images is started via the menu
option Images -> Save As.... Within the file choosing dialogue of
the operating system you should first specify the type of the resulting
image format. In the present case we choose 'TIFF 16'. Afterwards the
screen seen below opens. It is slightly different for every kind of
image type you have chosen.
Please note that you may specify a name of an image editing
application, which directly opens the resulting image and which allows
you further image processing. In the present case we have chosen
Irfanview (I_view32.exe). As a matter of course you may choose here
Photoshop or any other image editing application.
Start the image processing with Save.
| |
 |
| |
The Save dialog |
Final result
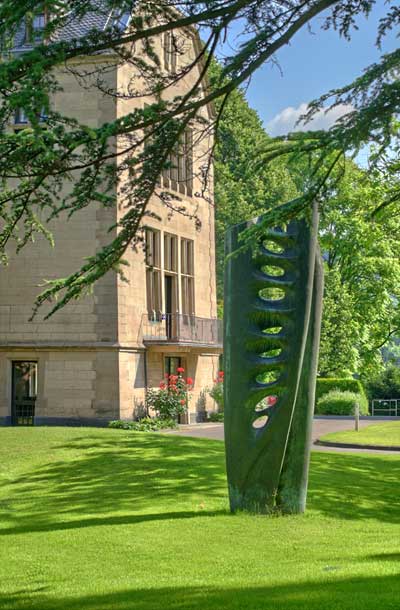
Concluding you find the two final results. Both pictures have been
created with the HDRI creation method Average and afterwards have been
tonemapped with Receptor and Compressor. We used the default settings.
| |
 |
|
|
| The Result |
End.
Do you have questions or suggestions?
If so you may want to publish them in the Forum.
|
